Wednesday, October 3, 2012

DYI In a rush or too tired cleaner for spilled milk!!

Ever spill some milk on the carpet and felt too tired to really clean it up the way it should be?
That happened to my husband and I the other evening...

Plumb worn out from a VERY long weekend and looking at a bowl of spilled cereal I told my husband to clean up the actual particles and then I'd grab something to take care of the mess until I could scrub the floor. This not only prevents oder, but it lets you rest calmly if you're too tired or too busy at that very moment. i.e One of the kids does this right before they need to be on the bus and you need to be headed off to work! This will save sanity, money and precious time if you're in a rush. 
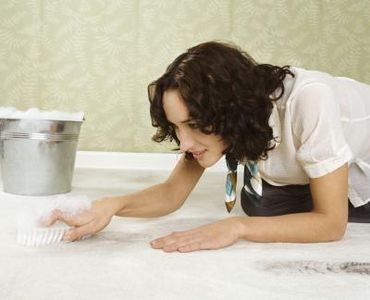


Here's how I cleaned it:

1. I had the cereal itself pickup and tossed 

2. Grabbed a couple towels and salt, then I loaded up area with salt and placed towels on it over night.
(The salt helps keep a sour oder away while soaking up any moisture.)

3. Take your sweeper the next day and remove towel to vacuum up the salt.

4. Grab some dish soap and hot water with a sponge or scrub brush and soak but not SOAK the carpet and scrub away for 2 min or so. Maybe less. 

5. Sprinkle baking soda over and replace a fresh towel over spot. 
(You can leave for the next day to clean for added assurance of a dry carpet.)

6. Vacuum 24 hours later and call it good :)

There won't be a smell and it's a safe non-toxic way to clean if you have kids or pets! Plus it's cheap.
I don't like strong smells with cleaners unless it's bleach haha I don't know why. 

**If you desire, you can use a homemade fresh scent spray (Which I will post a DIY later for that) over the area when finished, actually over the room for a super clean and therapeutic aroma! 

That's all for now, have a great day!

Shannon <3


Tuesday, October 2, 2012

DIY Fruit Fly Killer!

Ever notice how fruit flies multiply so quickly?
They hide in your kitchen and in your bathroom.

Well, we eat a lot of fresh produce in our house and noticed these little guys coming around lately...

YUCK!

Here's a DIY method that's non-toxic and doesn't have those awful fumes.


What you will need:

A clean mason jar

Apple cider vinegar

dish soap

Steps to prep:

1. Grab your mason jar, apple cider vinegar and dish soap.

2. Add 1 cup apple cider vinegar to jar then a few drops of dish soap

3. place in a location out of reach of children and traffic and let the trap do it's thing

It's nice cause it doesn't stink and it took me less than 5 min to make!
It's been under 30 min and it's already claimed a few lives, truly wonderful. :)

Shannon <3

Wednesday, September 19, 2012

Non-Toxic DIY Drain Cleaner!

Ever use those drain cleaners that aren't supposed to touch your skin?
Or they burn your nose with a level of intensity that it makes your eyes water?

I have too.

They work well but they're not exactly family friendly...

With my first baby on the way I'm happy to find new ways to clean and not worry if any harm is being done to me or my unborn child. Not to mention after the baby is born and begins to grow and explore.

Here's a cheap non-toxic DIY drain cleaner I JUST learned about and it seems to work really well!

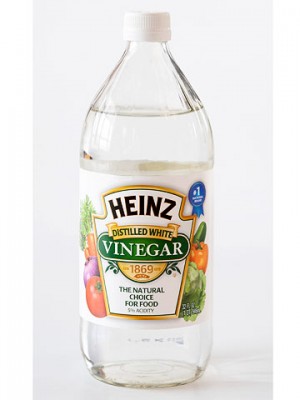
Baking soda & white vinegar.
(Your non-toxic DIY drain cleaner system!)

Seriously. That's it!

Here's what you do:

1. Sprinkle a healthy amount of baking soda down the desired drain or drains.

2. Pour your white vinegar down and listen for the "fizz" effect.

3. Quickly block the drain and let set for 30 min.

4. Run hot, hot water for 30 seconds down drain after plug has been removed.

5. And you're finished! Should be done weekly :)


Simple, easy and it doesn't hurt your skin or your nose.
(Unless you have an allergy to either. Then use gloves.)

Have a great day!

Shannon <3

Tuesday, September 11, 2012

DIY Coconut Oil Hair Treatment!

Greetings!!

I was thinking over some things I've tried for my hair that worked and were really easy and the coconut oil is my latest. Now yes it's oil and people can be leery of it but it needs to be seen as more of a friend vs foe. It's all about learning what type is best for you, problem solved. 

Aside from finding one for your skin type there is a super easy thing you can do for your hair as an overnight treatment. This is amazing for people who color their hair or have REALLY dry hair and need a boost of protection. 

Coconut oil is insanely hydrating and brings life back to your hair, esp after a color job.
i.e.
I let my sister play around with Manic Panic bleach and color on the most under layer of my hair for this cool peek-a-boo look. Yeah, their bleach is crap but we had fun. :)
(Not me, but you get the idea of what bleach does... Strips the hair!)

My sister told me to do an over night treatment on the bleached portion before we added color so I wouldn't end up with fried hair. Smart sister! (She's also one who does research on the whole hair side of things like I do skin ;) So I took her advice and decided to try the coconut oil...

The list of uses for this remarkable product is so vast I won't bother to keep you here prattling them off!
Just know, if you get an unbleached, organic brand from Whole Foods you should be safe.
I bought their store brand for my first try and so far so good.


What you'll need:

A head wrap or towel to protect your bedding/pillow

Clean spoon

pony tail holder and bobby pins

Coconut Oil

After your day has ended and you've washed your face, you are probably ready to call it a night...
This will only take a moment I promise!

1. Get your coconut oil and a clean spoon from the kitchen

2. Once in the bathroom and if desired a towel on your shoulders, scoop out enough to fit in the palm of your hand, but not so much you can rub your hands together w/out loosing half of it.
(You don't want a TON in your hair!)

3. Start working your way through your hair and avoid going directly to the skin, you don't want an oily face when waking up.

4. Use a pony tail holder to place hair on top of your head overnight.
(And bobby pins if you small strays with a layered haircut)

5. Place towel on pillow and go to sleep!

6. Shampoo as normal the next day.
(I usually lather-rinse-repeat. And used a liiiiittle conditioner on my ends out of sheer habit haha)

7. Try to see if you can go a day or two with shampooing as to let this treatment fully indulge your lovely locks! (I usually try to stay away from styling products for this so I don't have to wash my hair...)

(Add this list of foods to your diet for an extra "pow!" in your daily hair care routine...)

This saved my hair after that bleach and once again became super soft and manageable!

Enjoy,
Shannon <3

Please come visit me on my facebook page and click "Like" to follow more tips and tricks for skin, body and all over health at https://www.facebook.com/pages/Shannon-P-Aesthetician-Professional-Makeup-Artist/135714456464011

Thanks!

Monday, September 10, 2012

Deeper Nightly DIY Facial Cleanse!!

Good Morning!
I'm feeling really disconnected from my goofy pregnancy congestion this morning so if this sounds fuzzy, please forgive. ;)

I've been toying around with a better/deeper nightly facial cleanse since I've gotten pregnant and want to help this pregnancy acne clear up faster than what it was when it first kicked in. And this is not just for acne, it's for a cleaner face at night in general.

Doing some research and crossing my fingers I've tried various methods...
Some made me feel sick due to smell or made my skin irritated due to hormones being kinda crazy. After trial and error I think I'm finally onto something great!
Taking various ideas off youtube, trusted websites and my own personal experiences I've come up with  a satisfying nightly routine that I won't likely be changing any time soon.

During the day our skin is reacting to our hormones, stress levels, environment, makeup, food, water/liquid intake etc. All of this is on out skin at the end of the day. Kinda gross huh? 
Chances are we aren't getting it all off at night like we thought.
Double the yuck. 
Even the best cleanser can leave residue behind, sad to say.
But that doesn't make it an evil product!
Not by a long shot.

It just might need a little help at the end of the day...

What you'll need:

Cold pressed, extra virgin olive oil


Dickinson's witch hazel


A small plastic or glass bottle w/lid


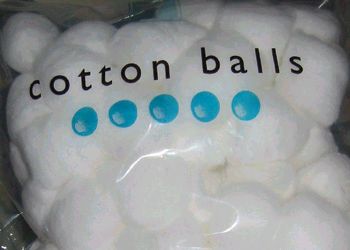
Cotton balls or cotton rounds


Your cleanser


Sea Breeze astringent (or favorite toner)


1. Mix equal parts of your olive oil and witch hazel in your little bottle.
Shake well before each use and store in a cool place.
(The finished product will look like a childhood science experiment :)

2. Squirt out onto cotton ball/round and apply to face.
Using upward and outward motion this will start to melt the makeup and gunk right off your face!
You will most likely go through several cotton balls but it's worth it.
**Yes, it's safe to use on eye makeup. 

3. After this step you may feel oily which is okay because you'll be taking some witch hazel alone on a cotton ball and going back over your face to clean up anything extra. This acts as a cooling effect and feels wonderful after a long day!

4. Get your cleanser and cleanse as usual. Circular motions up and out, rinsing with warm water.
(Never hot!) 

5. Pat your face dry and grab another cotton ball.
Apply your favorite toner, some more witch hazel or my personal choice, Sea Breeze astringent.
This will show if any residue was left behind and really set the pores up for a good night's rest!

6. Apply any serums or cremes and get ready for bed.
You're done!

Yes, there are 6 steps but after you have everything you need and you do it a couple times it goes by quickly. I actually spend less time getting ready for bed now because of this.
My skin feels cleaner, it's brighter, clearer (from my pregnancy breakouts), and less oily come morning!


** Not every skin type can use an astringent every day. So plan accordingly. 

This is truly the best night care system I've had yet!!
Enjoy.

Blessings,
Shannon <3


Friday, August 10, 2012

Take it back.. This is the BEST tub cleaner!!

Good Afternoon!!

I remember writing about a great tub cleaner being bleach and baking soda.

Well....

I found something that works a THOUSAND times better!!!

Mixing equal parts of blue Dawn and vinegar in a spray bottle, shake and spray.
Let sit for 15 min and sprinkle a little baking soda on the bottom of the tub and sides if you wish.

When we moved into this house the people before NEVER cleaned the tub so it had been what looked to be permanently stained. It was revolting! Finally cleaned it enough for safe showering but still... Never looked clean. Add to the fact my husband's black, rubber covered feet when he comes home from the dojo... Oi. I could scrub and scrub. The bleach helped but not like my newest discovery!

You'll need:

A clean spray bottle


blue Dawn soap


Vinegar

Mix equal parts and shake.
You're ready to clean!

Spray and let set for 15 min.
Sprinkle if desired, baking soda for added intensity!

I will never use anything ever again accept the aid of a magic eraser now an then :)

Give it a try :)

Blessings,
Shannon <3

Monday, July 23, 2012

Cheap DIY bathroom cleaners!

Good afternoon!!
I have some exciting news to be sharing soon but not just yet...
(It'll explain my lack of posting.)
The very idea of sitting down to think or experiment wasn't the most inviting idea during the last month or so... Eugh. However, I did get a lot of research in!

But now for today's blog DIY topic.
A cheaper and safer way to clean your bathroom!
I don't know about you, but I LOVE the smell of a freshly cleaned bathroom.
One of those satisfying things in life isn't it?
And is it just me or are cleaners and their prices skyrocketing?? 
Crazy with all of this inflation. :0/
Anyway.
Here are a few things to help you not only help your pocketbook save for a rainy day,
But also protect yourself against harmful chemicals.


 First Off!
Lemon/Orange Cleaner:
(Great for counter tops and toilet wipe downs)
You will need...
Plastic or glass spray bottle 

Vinegar

Water

Lemon and/or Orange peel
(I use both!)

1. You're going to mix 1 part water with 1 part vinegar to your spray bottle.

2. Add your peels 
(About 1 lemon and 1 orange if using both. If not 2 lemons etc..)

3. Let set for roughly 5-7 days in a cool dark place.
(You'll also want to keep it in such a location when not in use.)

4. Spray and wipe with paper towels when ready to clean!

Now the smell may be overwhelming to some but I find you do get used to it.


Next!

Toilet cleaner:


1. Sprinkle baking soda in and around the sides then add a little vinegar to the water.

2. Let set for 30 to 45 min if you can.
(10 to 15 on the low end)

3. Use brush to scrub then flush.

** Caution to how much vinegar you use, you don't need a volcano in your bathroom toilet ;)

** You can use this same idea for your bathroom tub too!
Just with some water and add the two ingredients and let set.
(Use a scrubby sponge :)


Yet Another!

Shower walls:

Take one of these little guys and fill with 1/2 vinegar and 1/2 Dawn dish soap.
Use after every shower and start noticing on how this helps.
(It'll be easiest if you use right before you actually get out of the show so you have that warm water running down the walls.)


I haven't found a floor cleaner that I like yet other than some diluted bleach... And I mean diluted!
And in a pinch I always keep those little Clorox wipes behind the toilet for mid week wipe downs. 

Well there ya have it!

Hope this helps, I know it def cuts back on the spending for cleaners and allows to save more for some other needed items or those days you simply need for fun!!

Talk at ya soon,
Shannon <3